Welcome
At first thanks for the interest! With this powerful WordPress theme, you can build Personal or Multi-Author blog websites. It is very easy to use and user friendly. With the WordPress Live Theme Customizer - a real-time Theme Options panel you can create your own, unique design. Multiple Blog page variations with cutting-edge Featured Posts Slider, Promo Boxes, Instagram Footer Area and many more are guaranteed to WoW and Inspire!
Vayne Pro Setup
Theme Download
After the theme purchase, you've received an email with a direct theme download link and the unique license key.
To get started, you need to download the theme first. Please watch this Video Guide to download the theme correctly.
Note: if you are a Mac Safari user, please watch this Video Guide.
Theme Installation
- Log into your WordPress Admin Panel, navigate to Appearance > Themes and click on Add New button (view screenshot)
- Then Click on Upload Theme button (view screenshot)
- Click on Choose File button and select vayne-pro-premium-latest.zip file that you have already downloaded
- Click on Install Now button (view screenshot)
- Click on Activate (view screenshot). You are done!
If you prefer a Video Guide, please watch this tutorial.
Mac Users - Vayne Pro Download
If you are a Mac user and running Safari browser you need to disable auto open of .zip files feautre from browser settings in order to download the Vayne theme .zip file properly. This video tutorial will guide you through the process. This is a very common issue for Mac users and could be fixed very easily.
FTP Install
- Extract vayne-pro-premium-latest.zip archive on your local machine
- Log in to your FTP program and go to WordPress themes folder wp-content/themes
- Upload extracted vayne-pro-premium folder in this directory
- Log in to your admin panel, then go to Appearance > Themes
- Now you'll see Vayne Pro theme in your themes list.
Demo Content
Navigate to Dashboard > Appearance > Vayne Options, click on Import Demo Content button and wait until it ends. Note that import time depends on your internet connection and server config.
Basic Setup
If you are not a WordPress beginner and you've just skipped the demo content setup you should get the basic idea how this theme works.
Menus
Theme supports 2 menus on 2 different locations: Top Menu and Main Menu, they both support multi level sub menus.
Top Menu is located in the Top Bar (the very top of your website). Navigate to Appearance > Menus, create a new menu, add menu items and set Display Location to "Top Menu" then click on Save Menu button.
Main Menu is located under the Page Header(logo section) and this is a main navigation of your website. To setup Main Menu navigate to Appearance > Menus, create a new menu, add menu items and set Display Location to "Main Menu" then click on Save Menu button.

Logo Setup
To set up a Logo navigate to Appearance > Customize > Site Identity > Logo Setup. Select an Image from Media Library or upload a new one.
Width option should be the same as your logo image width(x) dimension is. To setup a Retina logo, you need to upload 2x bigger image than the Width option is set, for ex: if the Logo image width(x dimension) is 400px, then you should set Width option to 200px.
Also, you can Show/Hide Tagline under the Logo image. Use Display Site Title and Tagline checkbox for that.
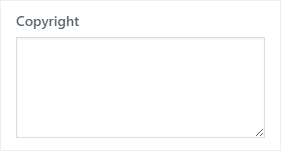
Copyright
You can add your own Copyright information from Appearance > Customize > Page Footer.
Featured Area
In the featured area you can display Featured Slider and Feautred Links(promo boxes).
Featured Slider
Enable Featured Slider from Appearance > Customize > Featured Slider. You can dislpay randomized All Posts or posts by Category in the slider. Also you can set the Number of Slides, which will limit the posts in the slider.
Please note that the post which does NOT have set the Featured Image will NOT appear in the slider.
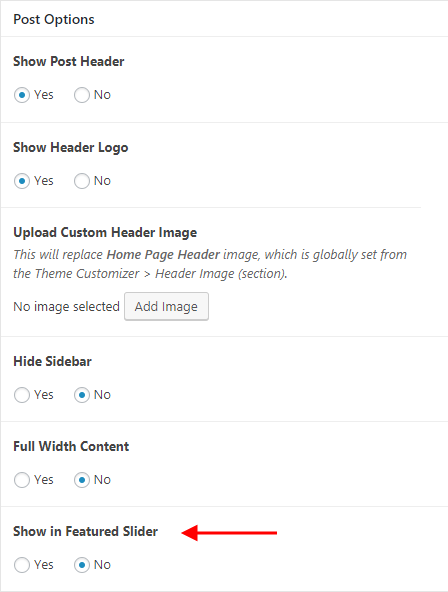
You can set specific posts by post options metabox to be displayed in the Featured Slider. Edit the Post, scroll down to the Post Options and set Show in Featured Slider option to "Yes" to display the current post in the slider. Navigate to Appearance > Customize > Featured Slider and set Display Posts option to "by Post Options - Metabox".

Also you can sort them by Date, Number of comments or just Randomize. You may enable/disable Slider Arrows, Pagination and other elements as well.
Featured Links
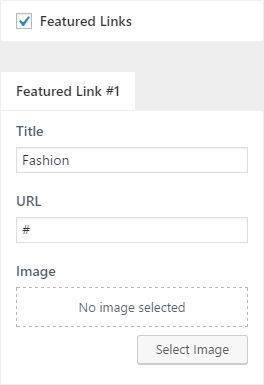
Featured Links or Promo Boxes will showcase your custom links or links to pages on your website. Go to Appearance > Customize > Featured Links and enable them via global checkbox. Then you should set a Title, URL and an Image, but note that without images they won't work properly. You can set up to 5 Featured Links, stretch them to fill the content width and enable/disable gutter.
Blog Feed
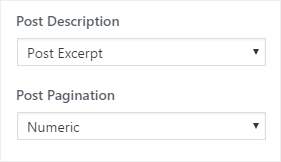
All Blog Page options are located in Appearance > Customize > Blog Page section. You can change Post Description type from Post Excerpt to Post Content. The Post Excerpt will display limited trimmed content(only words), while the Post Content will show original post content which could be cut by
<!--more--> tag. You can Change Post Pagination type from Default to Numeric as well.
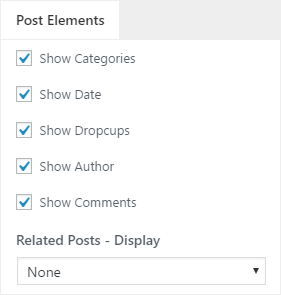
Also you can Disable/Enable some Blog Post elements such as Categories, Date, Author, etc...
Related Posts could be enabled by setting Related Posts - Display options to Related value. Please note that it will only appear on the Blog Grid if the Make First Grid Post Full Width is enabled or Blog Feed layout is set to List Style (General Layous > Page Layouts).
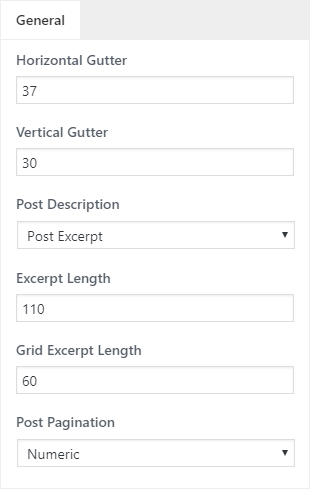
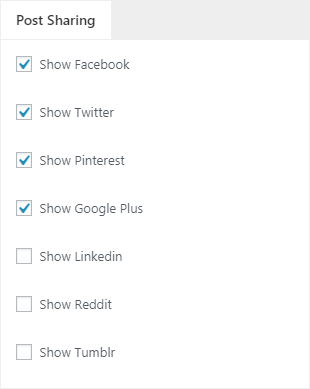
You can control Horizontal and Vertical gutters of your Blog Grid, set Post Excerpt Length, change Read More button text, disable/enable all elements, choose from 4 pagination types: Default, Numeric, Infinite Scroll, Load More Button. Pro version has inbuilt Post Sharing which could be enabled from the Blog Page section.
You can change Blog Grid Layout from Customize > General Layouts > Page Layouts(tab) > Blog Page.
Widgets
Theme supports 5 widgetized areas. Just add widgets in them and they will show up. Empty sidebars are hidden by default.

Sidebar Left widgets will be displayed on the left side of your Blog Feed and the Sidebar Right to the right side.
Footer Widgets will be displayed after your Blog Feed.
Sidebar Alt is and additional sidebar which is hidden by default and slides from left to right when the Sidebar Alt Icon is triggered. This icon is located on the left side of the Main Menu in the Main Navigation section. If the sidebar is empty, icon won't be displayed.
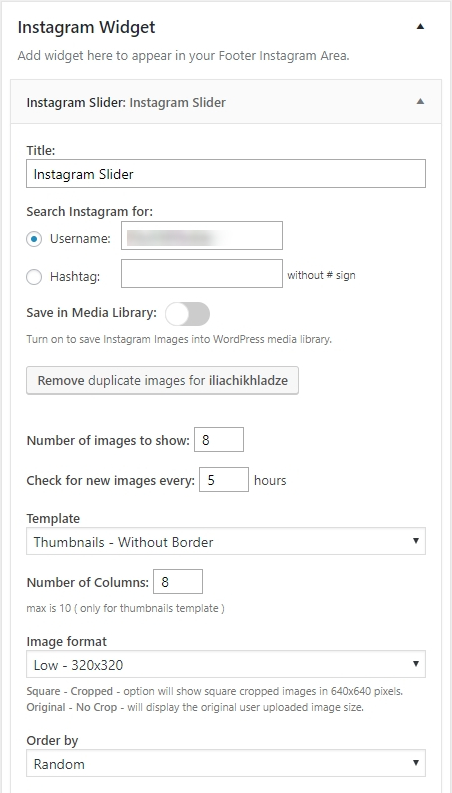
Instagram
To display your Instagram Feed in the page footer are, navigate to Appearance > About Vayne > Recommended Plugins and Install/Activate Instagram Slider Widget plugin. Then navigate to Apperance > Widgets and add Instagram Slider widget to Instagram Widget area. To get the same result as shown on our demo page, please configure the widget this way:
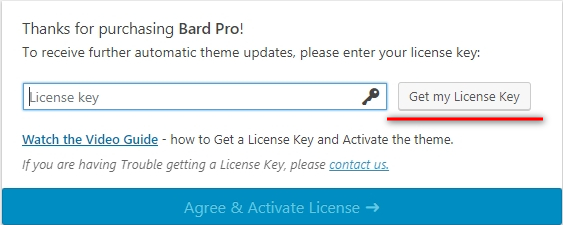
Theme License
Enter a License Key in order to receive Automatic Theme Updates which includes Feature Updates, Security Updates and Bug Fixes. After purchase you will receive an email with the unique License Key which then could be used for the theme activation. If you have not received this email yet, click on Get My License Key button and enter your email address to resend it but don't forget to check the Spam folder.
Note: If you have not received that email, please contact us and we will help you.
Social Media
To set up Social Media Icons navigate to Appearance > Customize > Social Media, first select the icon, then enter your social media URL. You can set up to 8 Social Icons and display them on 2 different locations.