Welcome
Thank you for your interest! News Magazine X is a powerful WordPress theme designed for both Magazine and Personal Blog websites. It’s user-friendly and easy to set up. With the WordPress Live Theme Customizer—a real-time theme options panel—you can effortlessly create a unique and personalized design
If you prefer a video guide for the theme, watch this tutorial.
Demo Content (Starter Templates)
Watch a quick video tutorial to learn how to import demo content or skip the video and read the text-based explanation below.
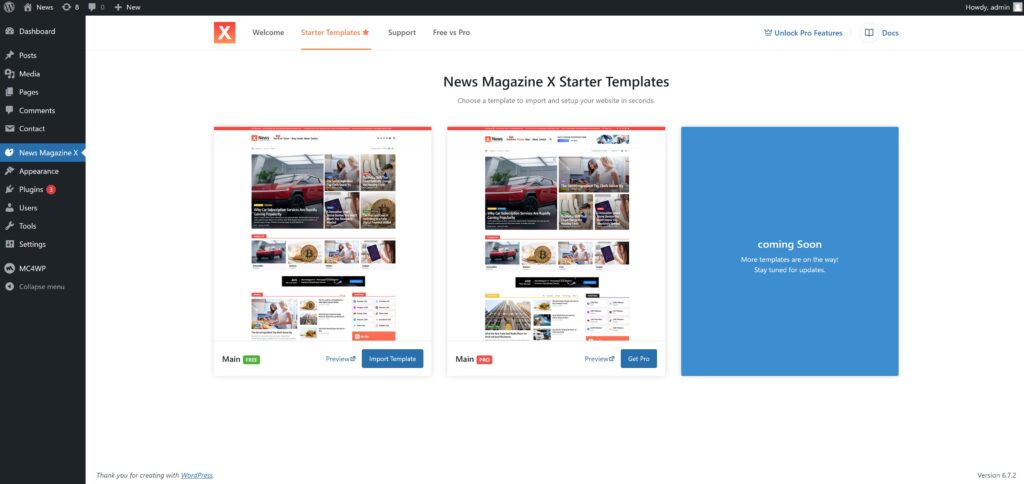
If you’re new to WordPress, we highly recommend installing the Demo Content. This will set up your site with a basic layout and content similar to our demo website. To import Demo Content Navigate to Dashboard > News Magazine X > Starter Templates and follow the instructions below:
- Select the template of your choice and click the Import Template button
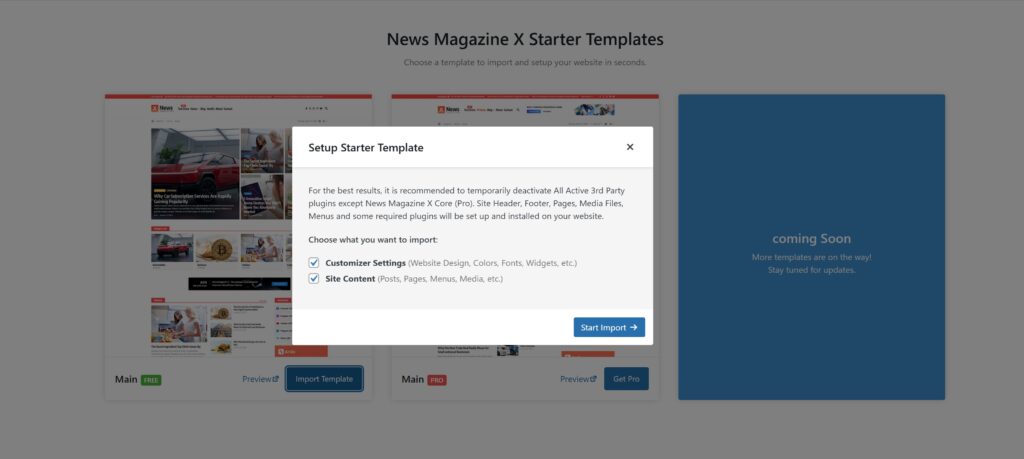
- Leave both checkboxes selected (Recommended)
- If you already have content and only want to change your website’s design, make sure to uncheck “Site Content”.
- Click Start Import and wait until import is finished.


Basic Setup
If you prefer to start from scratch and build your website yourself, it’s helpful to explore the theme-specific options first.
Install Pro
News Magazine X Core Pro is a powerful WordPress plugin that unlocks unlimited customization options for the News Magazine X theme.
To install it:
- Download the PRO Plugin .zip file.
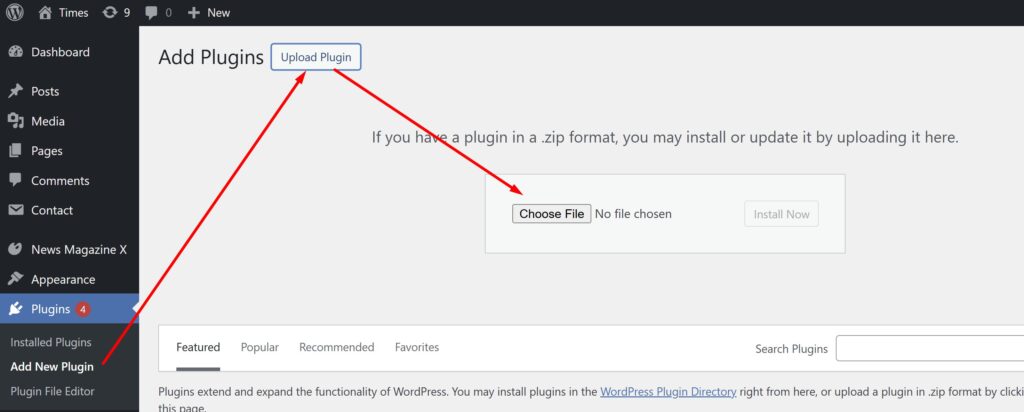
- In your WordPress dashboard, go to Plugins > Add New and click Upload Plugin.
- Upload the .zip file and activate the plugin.
- Enter the License Key sent to your email — and you’re all set!
Header & Footer Builder
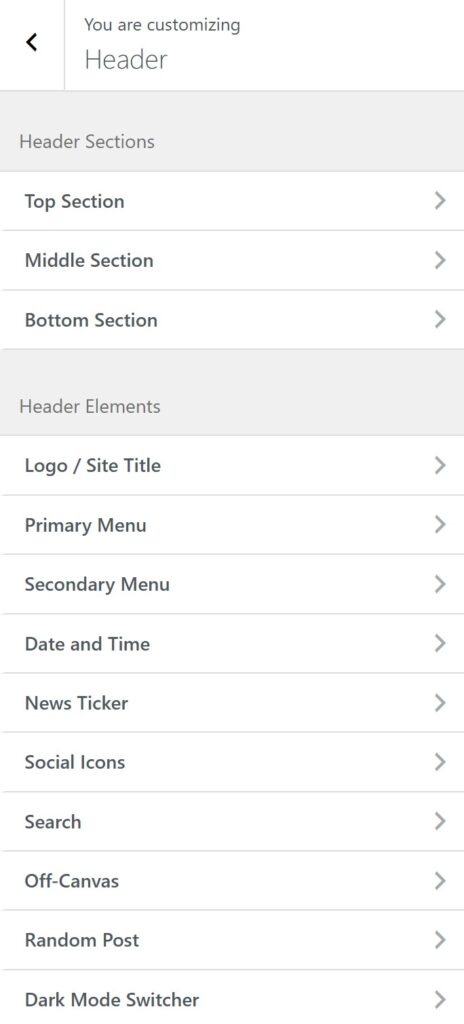
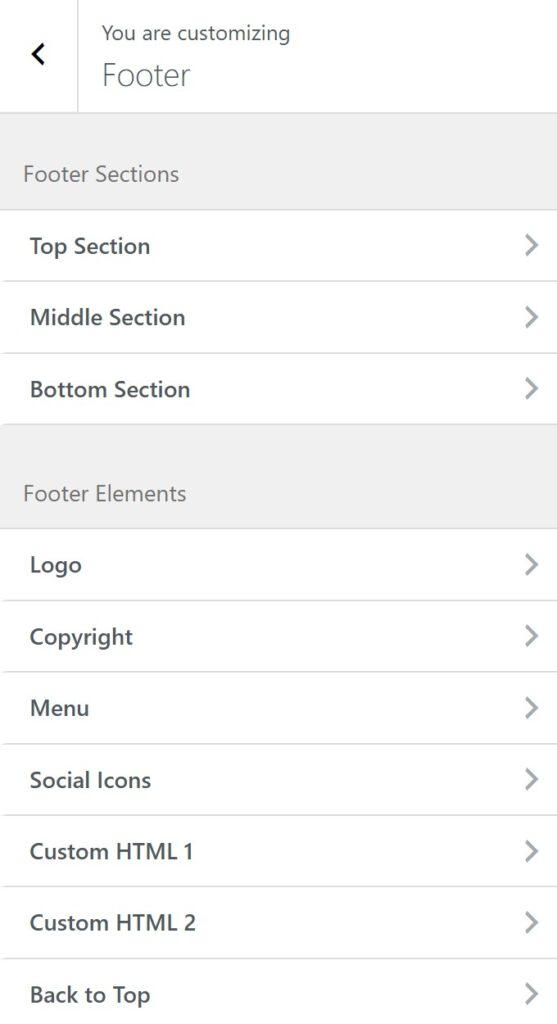
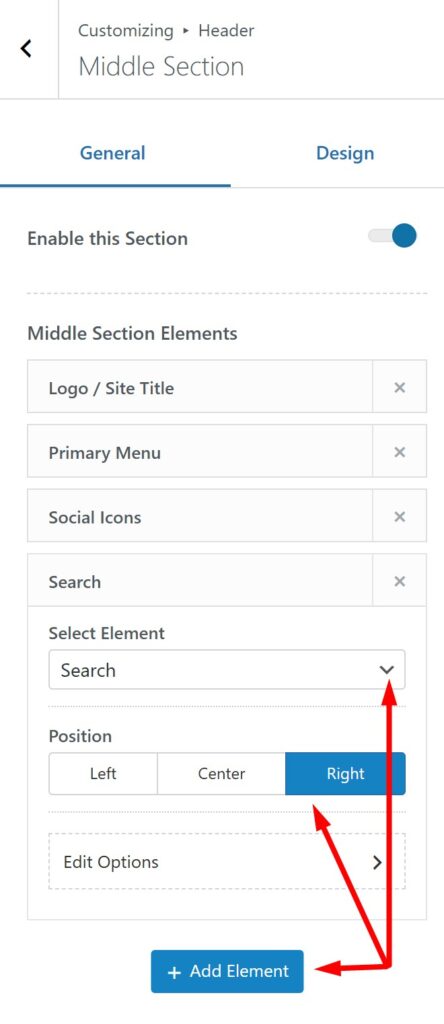
Header and Footer consists of 3 sections: Top, Middle and Bottom. Each section in Header is divided by 3 columns: Left, Middle and Right, while Footer has 6 columns layout. Header and Footer builders both have their own available Elements list.
To add an Element to the Header navigate to Header > Middle Section (for example) then click Add Element button and Select Element of your choice (same applies to the Footer Elements) and choose the Position (column) you want this element to appear.
Nav Menus
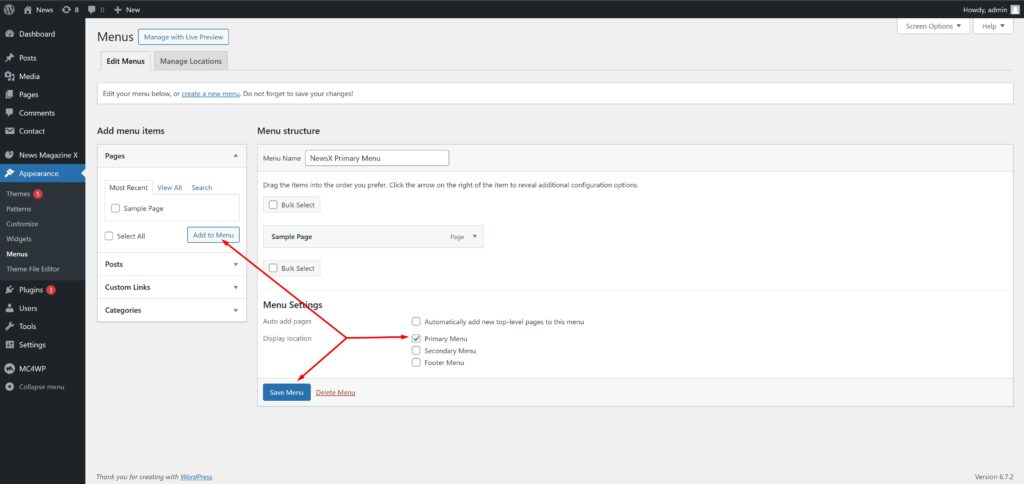
Theme supports 3 menus on 3 different locations: Primary Menu, Secondary Menu (located in header) and Footer Menu.
To set up a menu navigate to Appearance > Menus, create a new menu, add menu items and set Display Location to “Primary Menu” then click on Save Menu button (You can repeat the same process for other menu locations as well). You can access the Primary Menu options by navigating to Appearance > Customize > Header > Primary Menu.
Logo / Site Title
To set up a Logo navigate to Appearance > Customize > Header > Logo / Site Title. Select Image from Media Library or upload a new one.
To set up a Retina logo, upload an image twice the size of the Logo Width option. For example, if your uploaded logo is 200px wide, set the Logo Width option to 100px.
Social Icons
To manage Social Icons in Header navigate to Appearance > Customize > Header > Social Icons and to manage them in Footer go to Appearance > Customize > Footer > Social Icons.
Copyright
You can add your own Copyright information from Appearance > Customize > Footer > Copyright but please note that you can not disable the theme and author credentials in the Free version.
Front Page
To create a custom Front Page, you need to add a Section and assign Widget Area to it.
It may sound complicated at first, but we’ll make it easy for you. To manage Front Page sections navigate to Appearance > Customize > Front Page. If you haven’t been here before (haven’t changed anything yet), you should see that Section 1 is already added and Widgets Area 1 is already attached to it (Click Section 1 box to expand it).
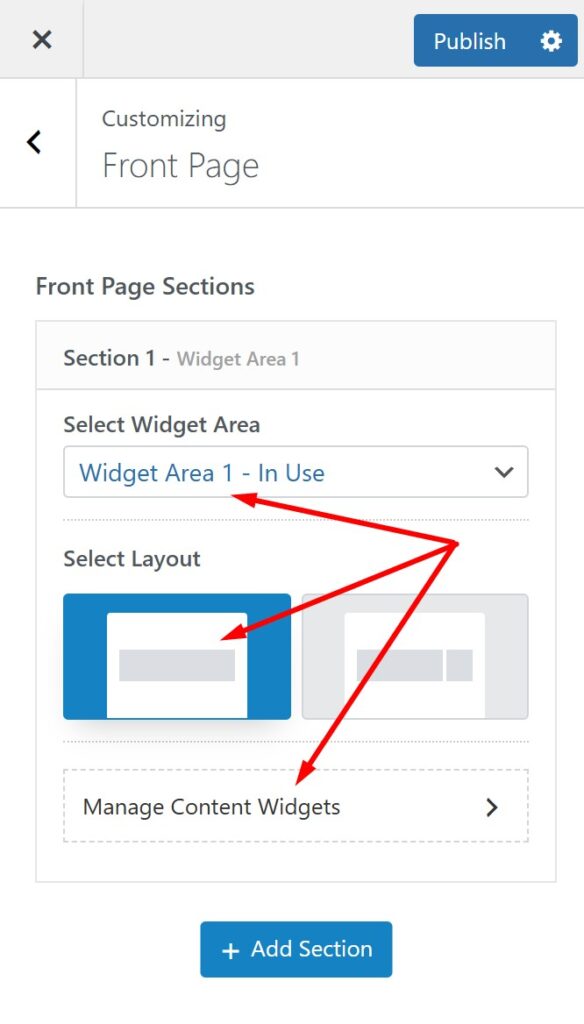
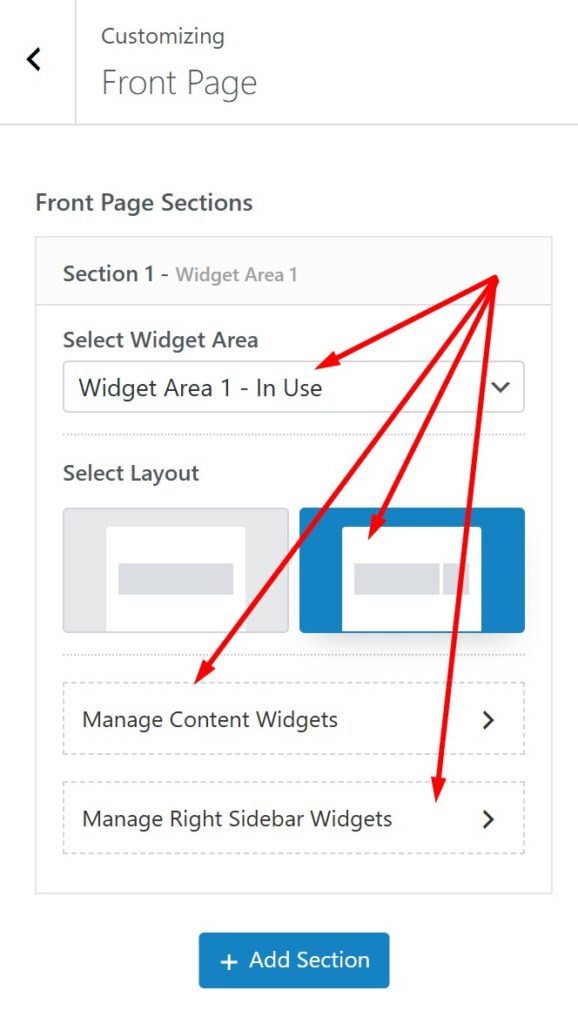
As you can see, the free version of the theme offers Two Layouts: 1 Column and 2 Columns (with Sidebar). After choosing your preferred layout for this section, you will be able to Manage Widgets for this column. Click the manage button and it will automatically redirect you to the attached Widgets Area panel. As soon as you add widgets/blocks to this widget area, they will appear on the Front Page. Also, you can enable “Hide Blog Feed / Static Page” option to hide extra sections (you won’t need this for the Custom Front page setup).
Theme Widgets (Blocks)
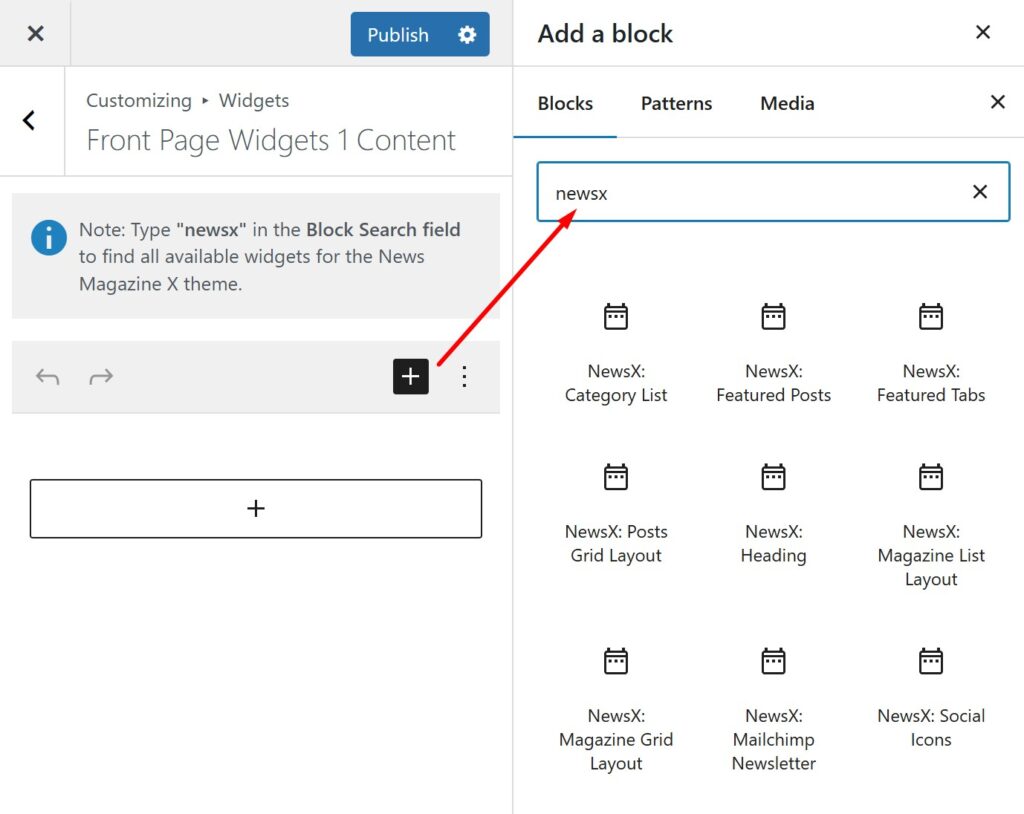
To access News Magazine X theme widgets press the + (plus) button and type “newsx” in the search field. This will display all available widgets for the theme. Once you’re familiar with it you can find widgets faster, simply add “newsx” before the widget name, such as “newsx magazine“, “newsx category” or “newsx featured“.
Pro Widgets
This section guides you how to use premium widgets.
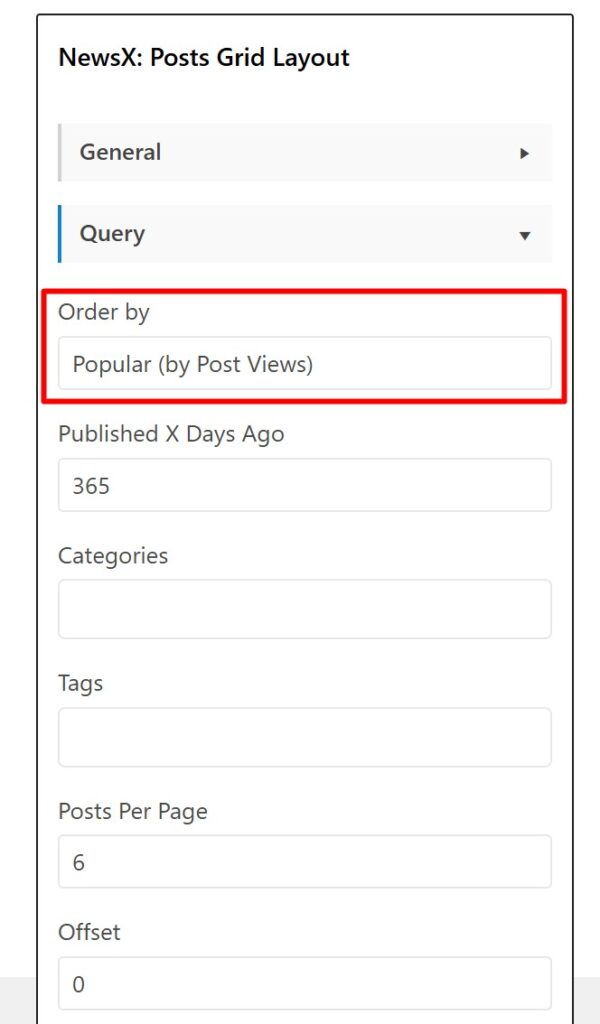
Order by Popular
News Magazine X Theme includes multiple widgets that display posts in various layouts. Most of these widgets feature a Query section where you can choose to order posts by popularity (Post Views). To enable this option, the Post Views Counter must be installed and active.
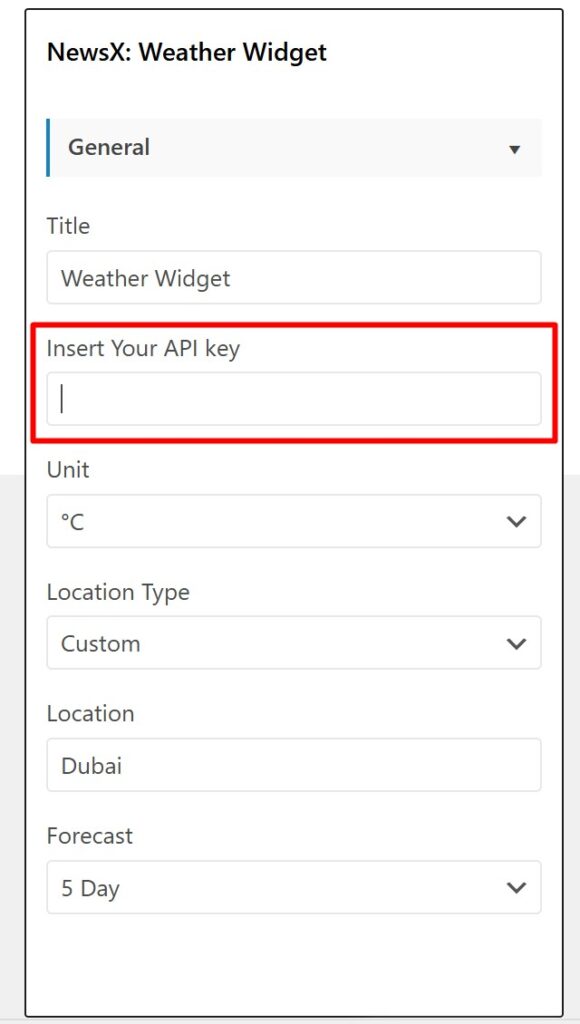
Weather Widget
In order to use Weather widget you will need to get openweathermap API key. Please follow the steps below:
- Go to https://home.openweathermap.org/users/sign_up and create account.
- Once registered, log in to your account and go to https://home.openweathermap.org/api_keys
- Copy API Key and paste into your widgets “Insert Your API key” field.
- Your weather widget API should be connected, now you can set Custom Location or Auto Detect.
Coming Soon!
We are currently working on the Theme Documentation, please check back tomorrow.

News
Magazine Theme